Configuring Your Minecraft Client For Use With the PVD Homeschool Minecraft Server
Because of the challenges inherent in operating any publicly available server some safeguards have been put in place. These safeguards require a specific version of the server software to be running in order to operate correctly. Thus you must do some slightly specialized configuration of the game client in order to connect and play on the server.
The following information is provided to help you get your game client configured properly.
Note: Before you continue please ensure you have read and your child understand the rules governing use of the server.
Note: before you start this process, make sure you've been white-listed by the server administrator(s). See this page for instructions on completing that process.
Step 1 Edit or Create a new profile
If you do not already have a 'profile' in your Minecraft Loader you must create one. If you already have a profile, then click the 'Edit profile' button. See Figure 1-1

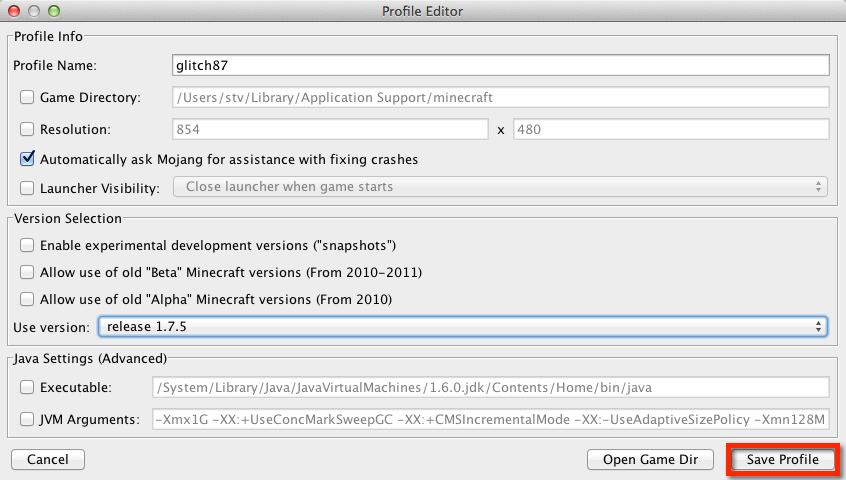
Within the "Profile Editor" you must select the "Use version" setting and ensure it is set to "release 1.7.5". Refer to Figure 1-2.

After selecting the correct value in the "Use version" setting, click the "Save Profile" button as shown in Figure 1-3.
Step 2 Adding a Multiplayer Server
After you've configured your profile to use the correct game client version you must add a multiplayer server connection. Start by clicking the big "Play" button on the Minecraft Launcher as is visible in Figure 1-1.
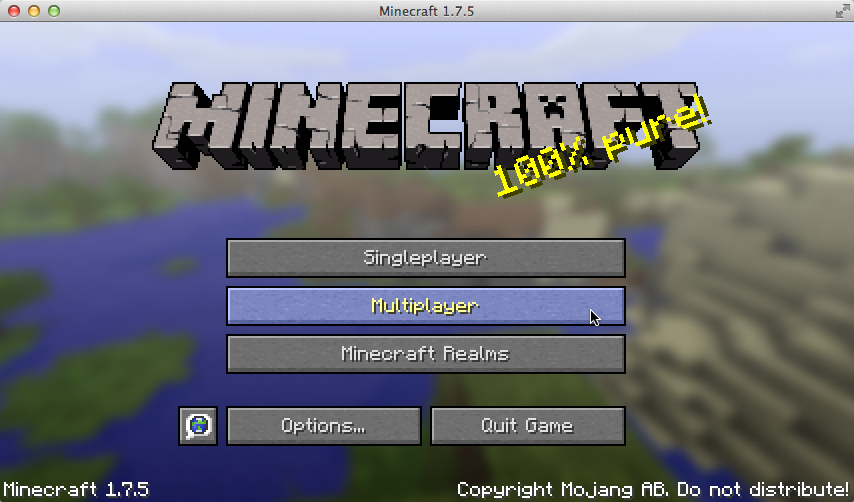
Once the game client has fully loaded, click the "Multiplayer" button as shown in Figure 2-1.
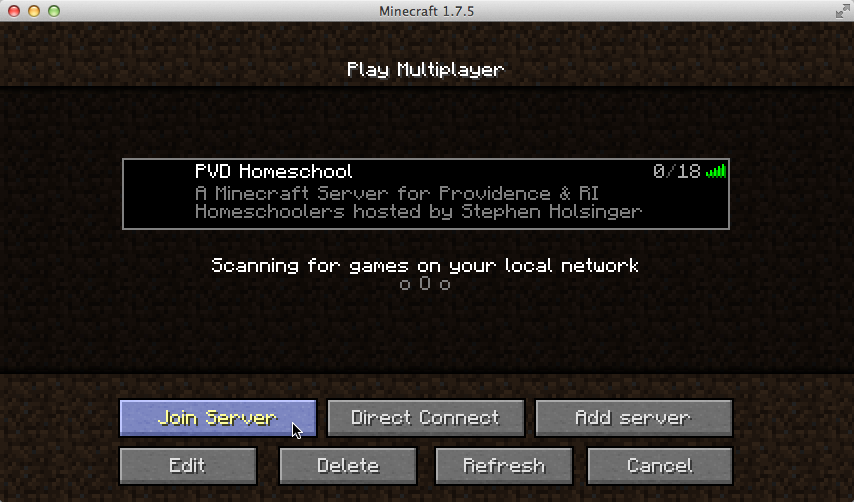
After you click the "Multiplayer" button on the main game client screen, you will see a list (possibly empty) of servers you can connect to. If the PVD Homeschool server is not in that list click the "Add server" button as highlighted in Figure 2-2.

After clicking the "Add server" button you should see the "Edit Server Info" screen. This screen has a fields labeled "Server Name" and "Server Address". Enter the following into those fields as shown in Figure 2-3.
| Server Name | PVD Homeschool |
|---|---|
| Server Address | pvdhomeschool.beastmc.com |
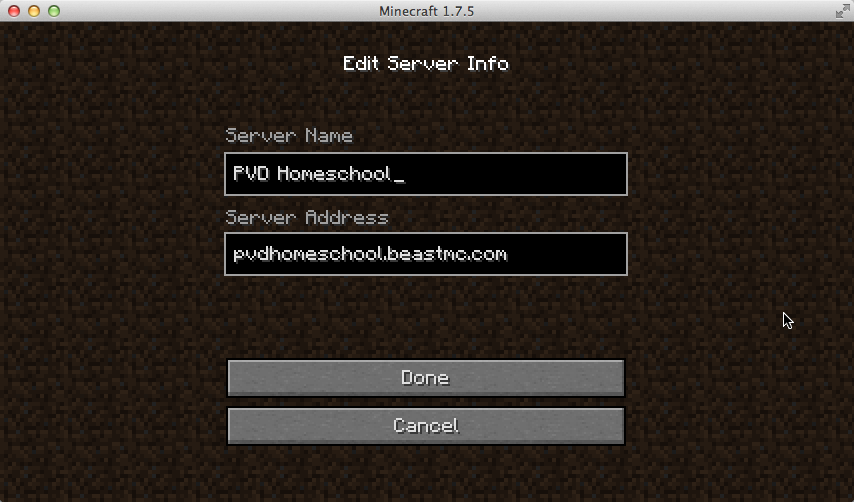
Click the "Done" button when you have verified the information has been entered correctly. This will add the server to your list of available multiplayer servers. Scroll to the PVD Homeschool server on the list of servers (if necessary) and click on it to select it. Then, click the "Join Server" button as shown in Figure 2-4.